Categories

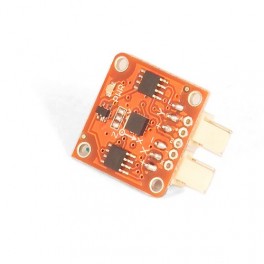
TinkerKit 2/3 Axis Accelerometer

TinkerKit 2/3 Axis Accelerometer

More details

A2-0119

Warning: Last items in stock!

23,66€

Add to wishlist

30 other products in the same category:

Previous
Next

TinkerKit 2/3 Axis Accelerometer

An accelerometer is a device that measures acceleration. It is very common in consumer electronics such as portable electronic devices and video game controllers to detect movement using accelerometers.

Output: This module outputs 0V to 5V on one of its two signal pins when its G-force is changed (e.g. is moved). The value is approximately 2.5V when there is 0G on the X or Y axis. When you connect this module to the input on an Arduino using the TinkerKit Shield, you can expect to read values between 0 to 1023 while moving the module.

Module description: On the back of the module you can find two signal amplifier and a green LED that signals that the module is correctly powered. The module is based on theLIS344AL by ST Microelectronics, and is a three-axis acceremoter. You can get data about the third axis (referred to as Z) by soldering a header to the thru-hole labeled "Z".

This module is a SENSOR. The connector is an OUTPUTwhich must be connected to one of the INPUT connectors on the TinkerKit Shield.

Code Example


/*
 Double Analog input, Double analog output, serial output

 Reads from two analog input pins, a T000020 Accelerometer Module connected to I0 and I1, maps the result to a range from 0 to 255
 and uses the result to set the pulsewidth modulation (PWM) on two T010111 LED Modules connected on O0 and O1.
 Also prints the results to the serial monitor.

 created 29 Dec. 2008
 Modified 4 Sep 2010
 by Tom Igoe
 modified 7 dec 2010
 by Davide Gomba 

 This example code is in the public domain.

 */


#define O0 11
#define O1 10
#define O2 9
#define O3 6
#define O4 5
#define O5 3
#define I0 A0
#define I1 A1
#define I2 A2
#define I3 A3
#define I4 A4
#define I5 A5

// These constants won't change.  They're used to give names
// to the pins used:
const int analogInPin1 = I0;  // Analog input pin that the Accelerometer's first pin is attached to
const int analogInPin2 = I1;  // Analog input pin that the Accelerometer's second pin is attached to

const int analogOutPin1= O0; // Analog output pin that the LED is attached to
const int analogOutPin2= O1; // Analog output pin that the LED is attached to

int sensorValue1 = 0;        // value read from the Accelerometer's first pin
int sensorValue2 = 0;        // value read from the Accelerometer's second pin

int outputValue1 = 0;        // value output to the PWM (analog out)
int outputValue2 = 0;        // value output to the PWM (analog out)

void setup() {
  // initialize serial communications at 9600 bps:
  Serial.begin(9600); 
}

void loop() {
  // read the both analog in values:
  sensorValue1 = analogRead(analogInPin1);  
  sensorValue2 = analogRead(analogInPin2);  
  // map it to the range of the analog out:
  outputValue1 = map(sensorValue1, 0, 1023, 0, 255); 
  outputValue2 = map(sensorValue2, 0, 1023, 0, 255); 
  // change the analog out value:
  analogWrite(analogOutPin1, outputValue1);    
  analogWrite(analogOutPin2, outputValue2);   

  // print the results to the serial monitor:
  Serial.print("accelerometer X = " );                       
  Serial.print(sensorValue1);   
  Serial.print("t accelerometer Y = " );                       
  Serial.print(sensorValue2);     
  Serial.print("t output 1 = ");      
  Serial.print(outputValue1);   
  Serial.print("t output 2 = ");      
  Serial.println(outputValue2);

  // wait 10 milliseconds before the next loop
  // for the analog-to-digital converter to settle
  // after the last reading:
  delay(10);                     
}

Basket  

No products

0,00€ Shipping
0,00€ Tax
0,00€ Total

Prices are tax included

Check out

Newsletter

PayPal

TESt"; ?>